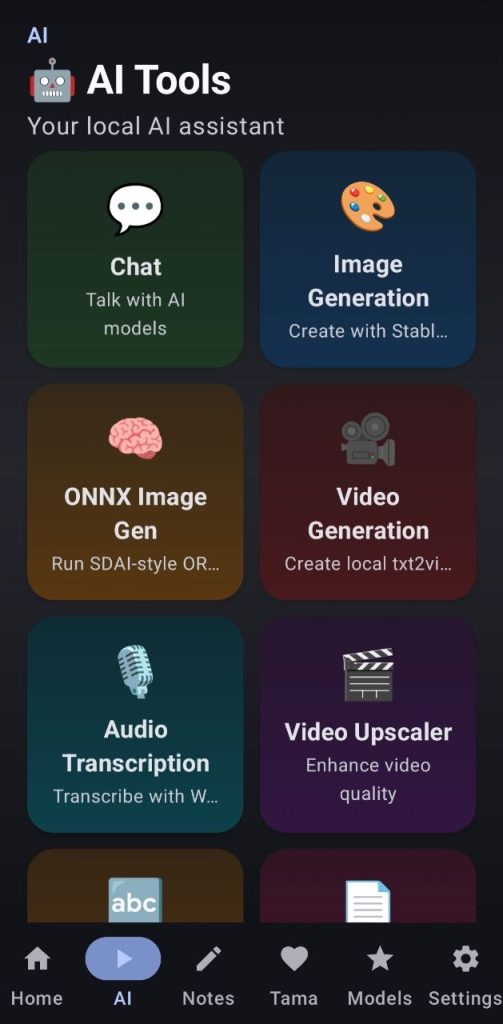
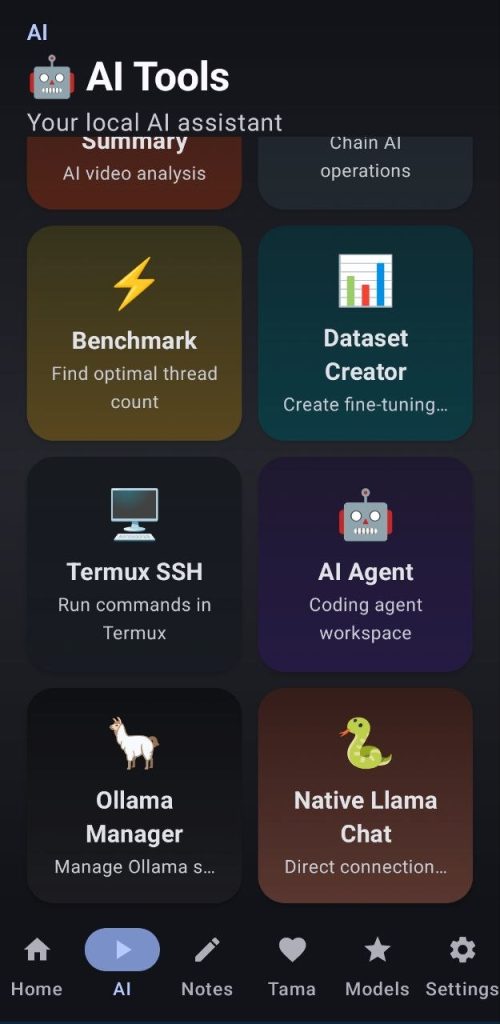
AI HUB
Here you will find most of the app’s utilities, which let you squeeze every last drop of power from your phone.
1. SERVERS
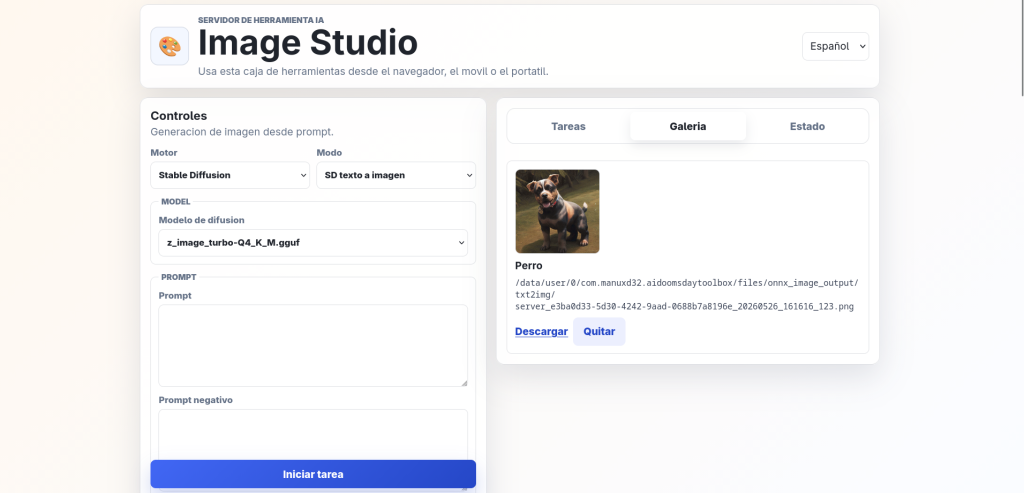
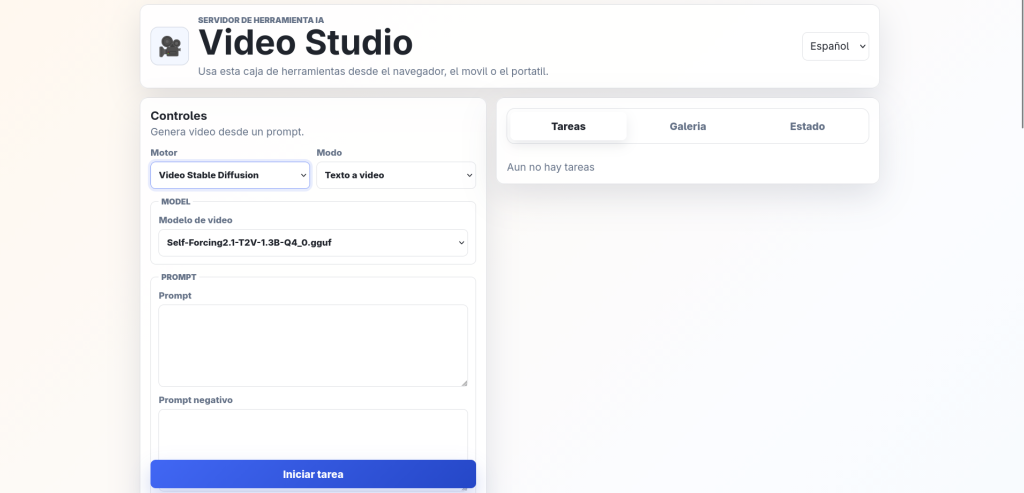
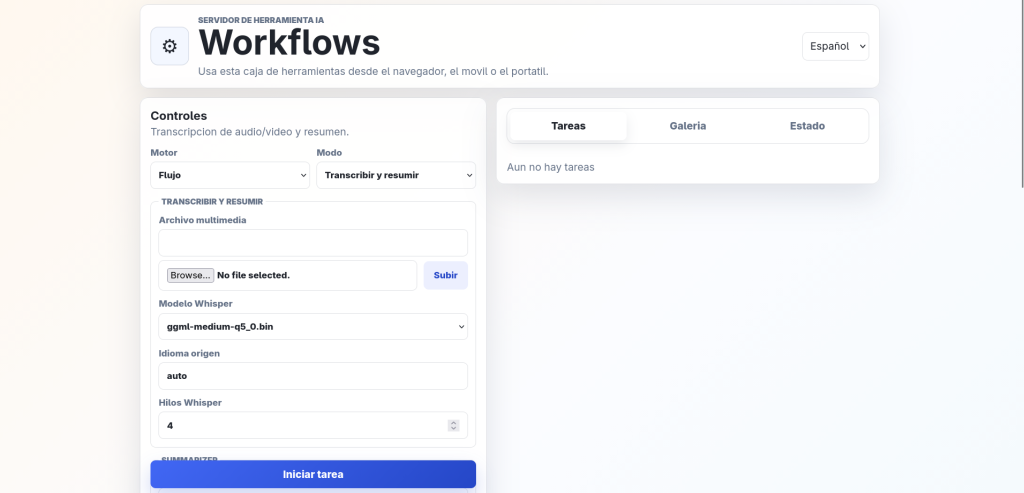
This feature allows users to use 7 different studios to make use of the app tools from other devices. Specific users can be created from within the app and give access to different studios.
- Image studio: Image generation and BG removal
- Video studio: video generation
- Workflow studio: use app’s workflows
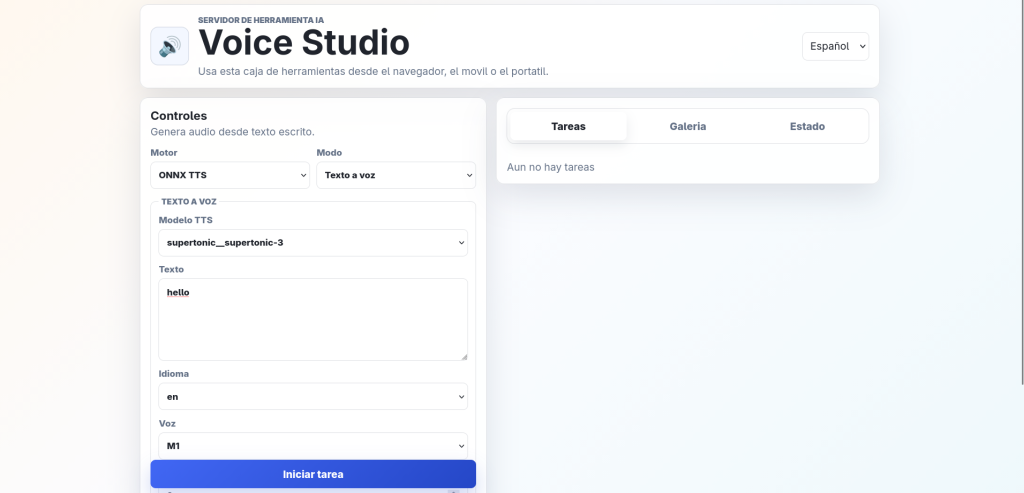
- Voice studio: TTS and document to speach
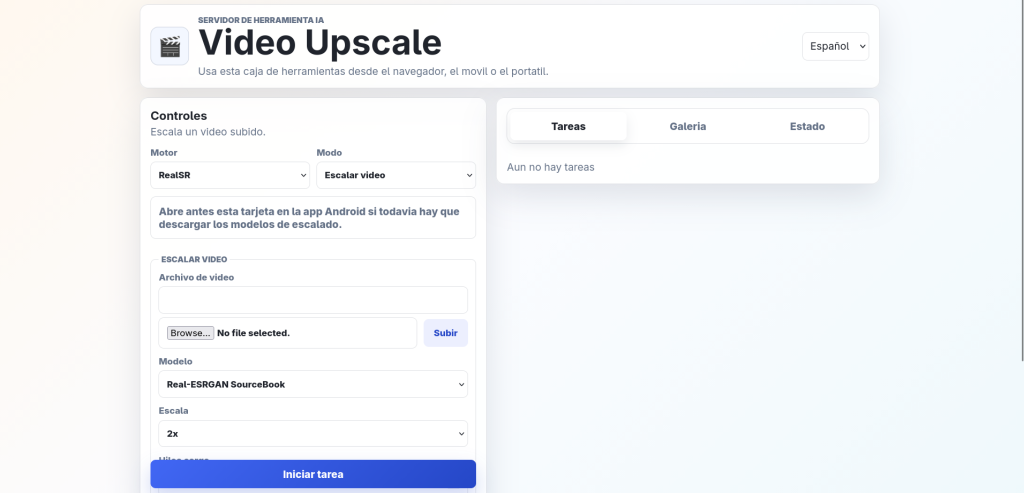
- Video upscale studio: upscale videos
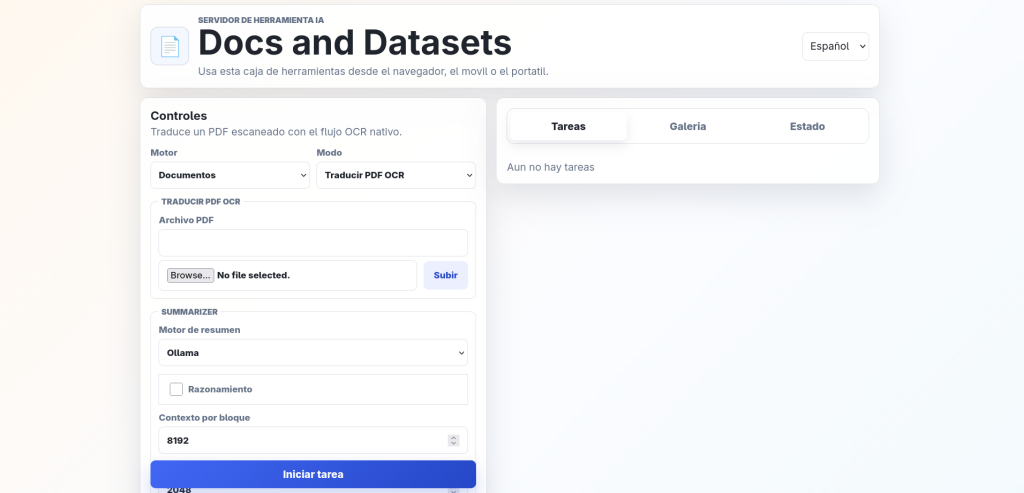
- Docs and Datasets studio: Use all the PDF tools and summarize videos (The dataset feature is still a work in progress from the webui, for better results use the app)
- Chat studio: use chat llama native from a webui
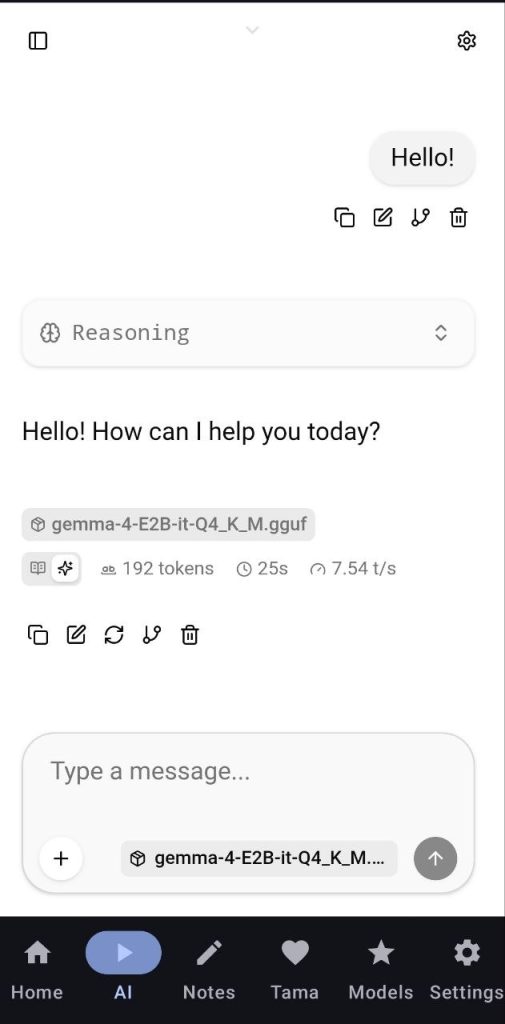
2. CHAT
Let’s start with the reason I created this app, chatting with LLMs
To use this feature we first need to do some configuration:
- Download an LLM model from the models tab covered here
- Select it in the LLM Settings, make sure you choose the options that best suit your needs and activate vision mode if needed/wanted and Remote Access if you want to be able to chat from other devices in your network (the heavy lifting will still be done by your device). The settings of the app will be explained in depth here
- After that start the server in the dashboard by hitting «Start LlamaCpp»
- Go to the Chat card in the AI Hub and that’s it, happy talking!!
- You will notice there is a tiny little arrow in the top of the chat screen, click it and click on «Clear chat» if you ever encounter an error or want to reload the page, it will also help if you opened the chat card before starting the server
3. Image Generation (Stable diffusion version)
In this card you will be able to use the models for image generation that you downloaded from the models tab, I recommend using the v1-5-pruned-emaonly-f16.gguf model, it is a SD Checkpoint and you can use it on its own, the results are good enough and you don’t really need a very powerful device to use it. For upscaling you can go for any of the RealESRGAN models.
For better results and understanding of the text I recommend using the Z image quantised models, this requires more setup as you will need to also use a CLIP model and a VAE model. I use z_image_turbo-Q4_K_M.gguf the ae.safetensors for z image models and then Qwen3-4B-Instruct-2507.Q3_K_M.gguf as the text encoder (import/download it as LLM for use here)
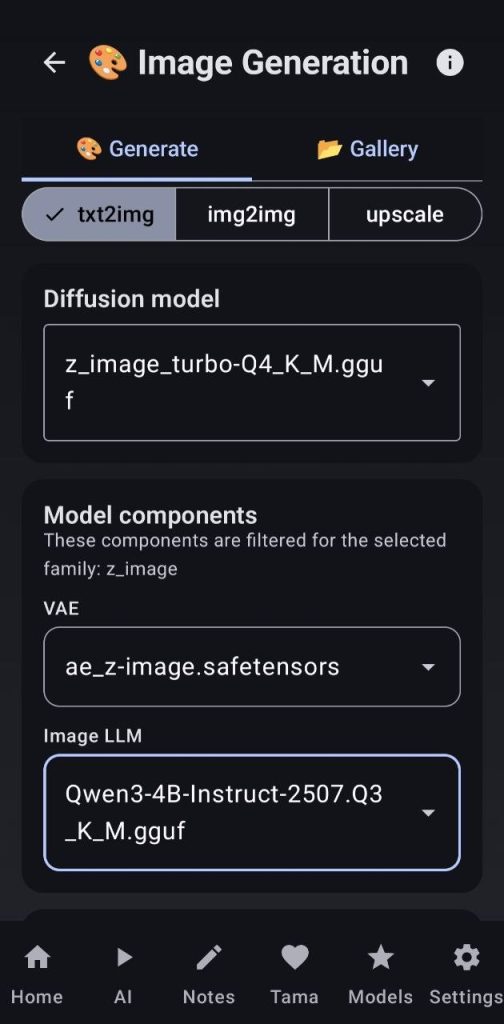
To use txt2img or img2img, the process is the same: select your model, write a prompt and a negative prompt (optional) and then choose the resolution, steps, cfg, sampler, threads, etc… and finally the runtime options. I recommend to tinker with them until you get your perfect options
The upscale mode will allow the user to upscale any picture by a factor of X, usually each model performs just one kind of upscaling indicated in the name, for example «RealESRGAN-x4plus_anime-6B-F16.gguf» will perform only x4 operations and works best on anime like photos, if you want more than what your model allows you can always repeat the upscale, or directly select the amount of repeats you want in the UI
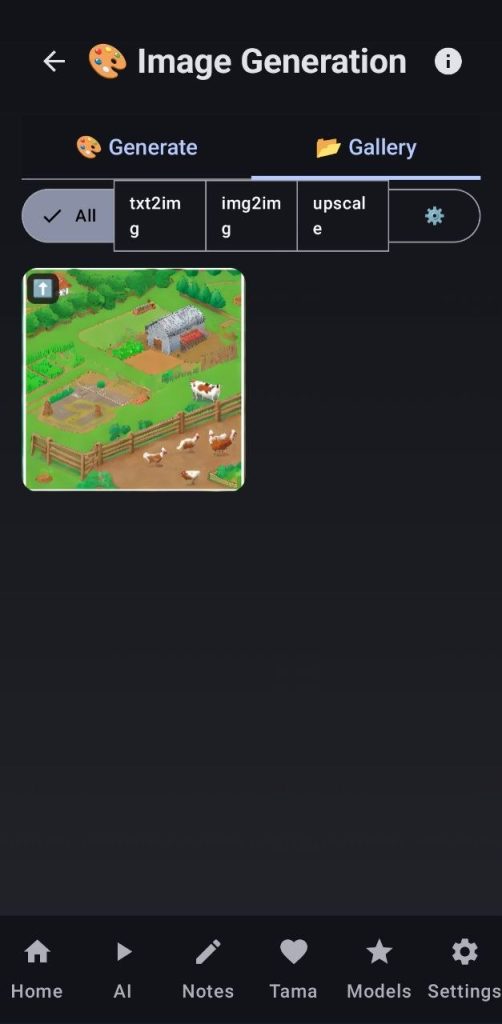
Finally you can see all the generated/upscaled images in the gallery and in the folder you selected as output in the configuration settings
Tips:
- Try to always use a square resolution, as these models usually work better with it
- If your phone is not very powerful try not to take the resolution higher than 512×512 (this will already take some time with some models), remember you can always upscale the images
- Standard steps and CFG are usually good, but you can research for your use case and model
- Enabling the runtime options will save on RAM usage but also harm the performance and sometimes the quality of the final result
- The upscale will automatically grab the Model factor from the model’s name, so when importing a model try to leave that there, also even though a model automatically shows in the model picker, always reselect it so the change in the Model Factor is visible and the estimate of the final output resolution is accurate
4. Image Generation (ONNX version)
This image generation tool uses the power of ort runtime that is optimized for mobile devices, that means that you will usually get high quality images in less time and with less battery consumed, that’s why this is the kind of generation we support in the AI Agent tool and in the pet tab
Here you can also do txt2img and img2img, even though the last one is still a work in progress
First of all you need to download a model from the onnx models card in the models tab. I recommend using the SDAI models if you only plan on doing txt2img as they weigh a little less, but if you want to try the img2img generation you will need the ManuXD32 variant.
Once the setup is done the process is more or less the same as the SD image generation, write the prompts, and hit generate image, you will notice the generation times are way higher than the SD ones, in my testing, using DreamShaper and 20 steps, a 256×256 image generates in under a minute and a 512×512 image generates in under 3 minutes while keeping very high quality if prompted well enough.
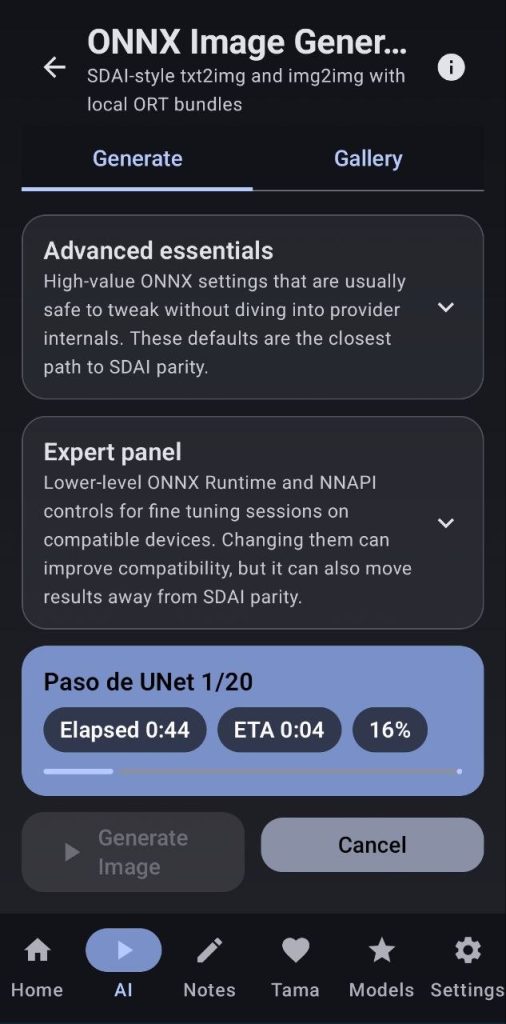

I recommend not touching anything from the Expert panel as it is still experimental, but you can tinker with it if you feel like experimenting.
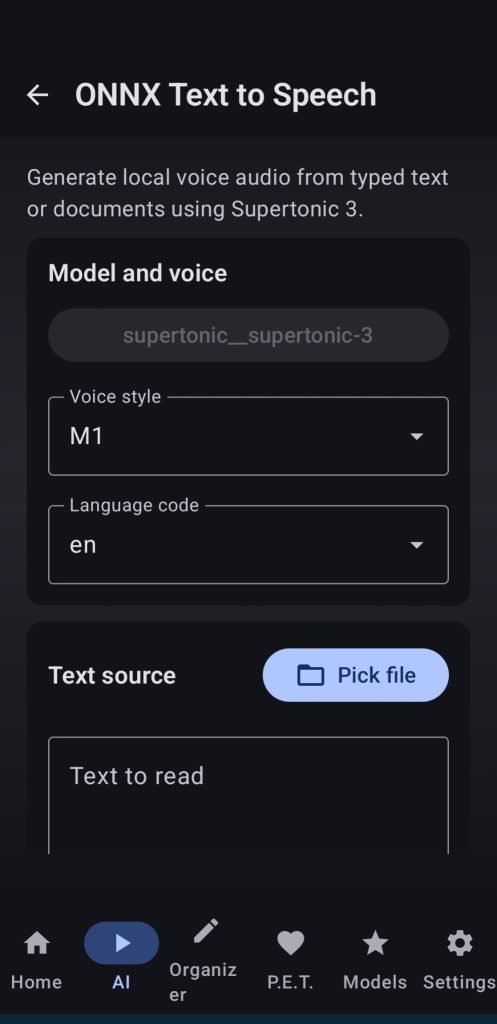
5. Text To Speach
Download the Supertonic model from the ONNX Models UI, select a voice style, a language and write text or choose a pdf, txt, etc… file, adjust speed and quality steps and wait for the app to generate an audio file that you can listen to from the UI.

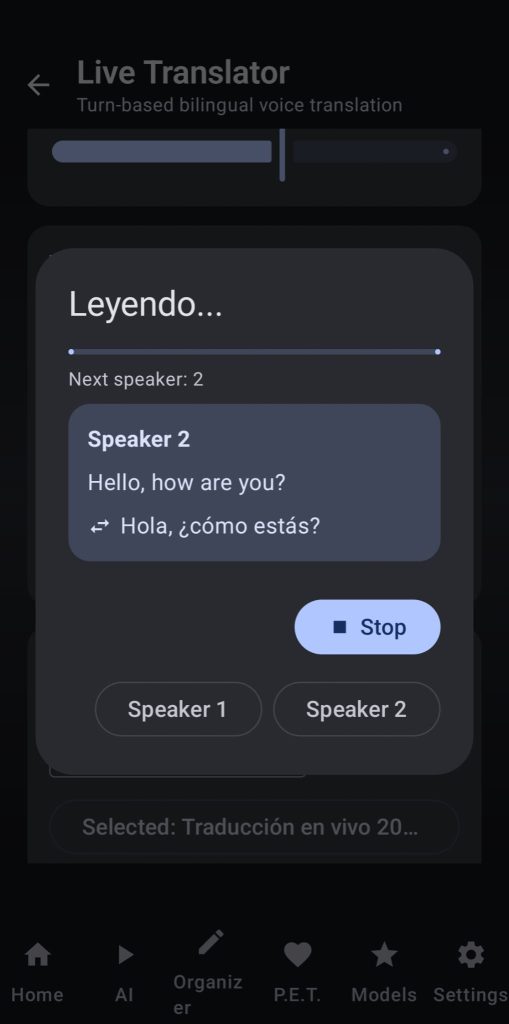
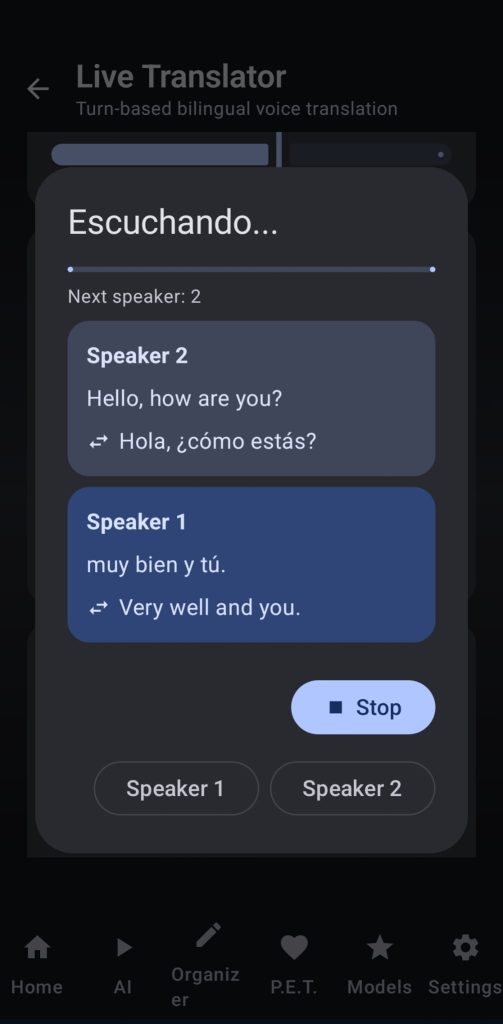
6. Live translator
Here the user can use the power of whisper, LLMs and TTS to have live conversations in two different languages at a time. Choose the language of the speakers, the whsper model and threads, your translation LLM backend (I recommend using gemma4 2 or 4b) and your TTS favorite settings.
After hitting start live transcription the app will wait for one speaker to talk, will autodetect the language, translate to the other speaker’s language and then use TTS to read it out loud, after that it will wait for the next speaker to talk.
Transcriptions of the conversations are saved so the user is able to revise them when finished.
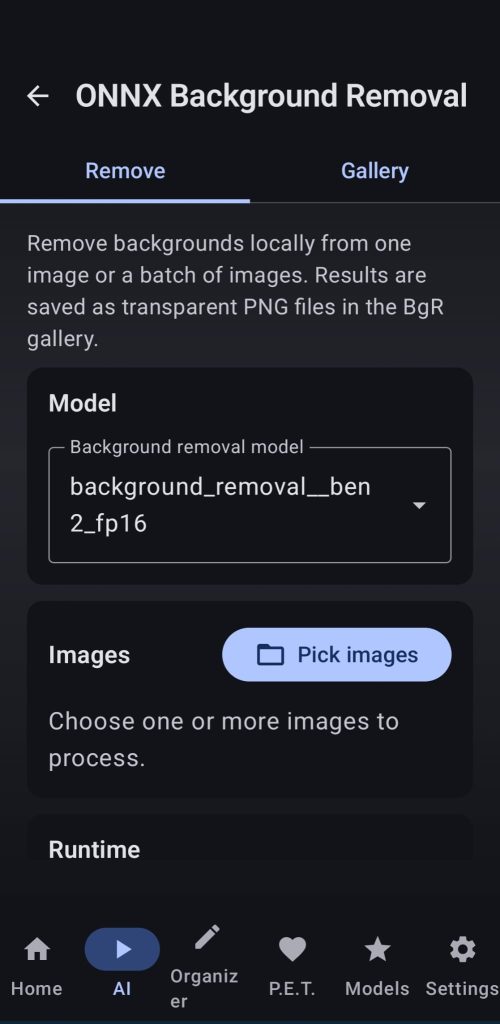
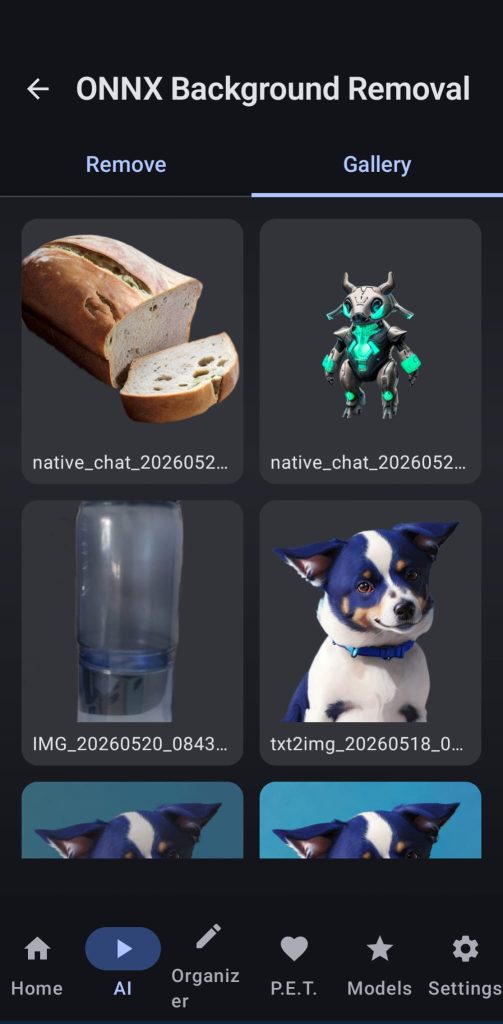
7. Background remover
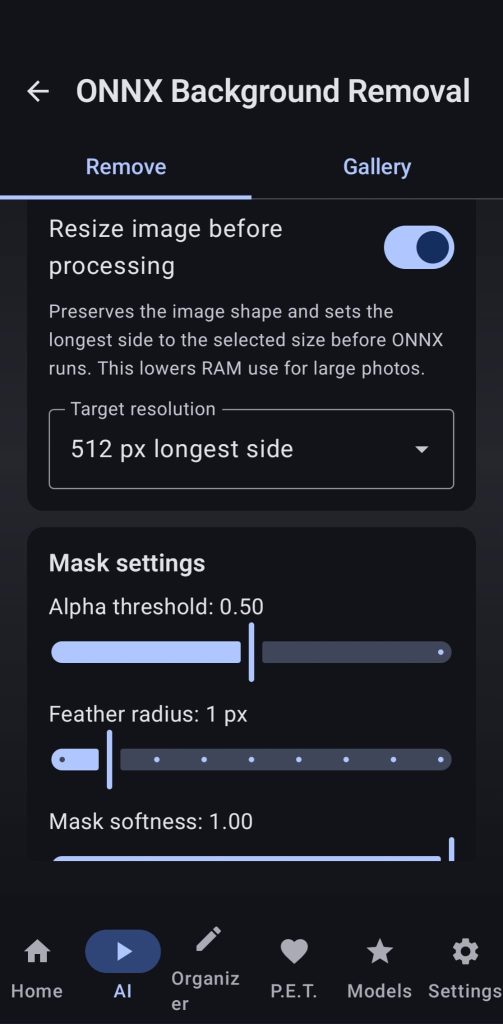
Use ONNX BgR models to remove the background of the desired images, select your desired settings and even resize the image before running the task for RAM usage optimization
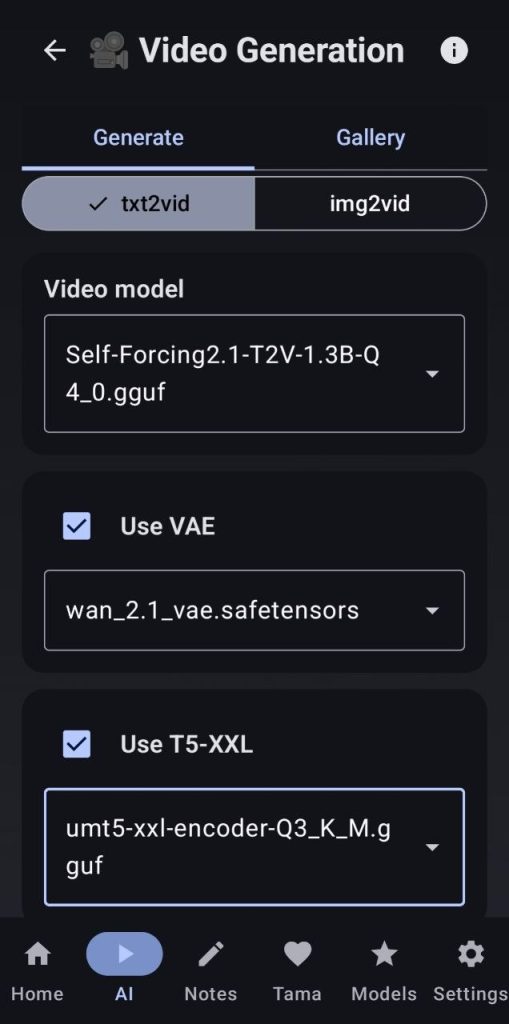
8. Video Generation
This one might disappoint some of you as you will need at least 16GB of RAM and no less than 12GB, but you can always try with different models and settings to try to squeeze your phone’s capacity.
I would recommend these models and settings:
- Video model: Self-Forcing2.1-T2V-1.3B-Q4_0.gguf
- VAE: wan_2.1_vae.safetensors
- T5-XXL: umt5-xxl-encoder-Q3_K_M.gguf
- Frames: 8
- FPS: 5
- Width and Height: 240 and 416
- Steps: 18
- CFG: 6
- Flow Shift: 1.5
- VAE tiling: on and at 32×32
- Cache: on with spectrum mode and the recommended options that show when clicking the box, but this option is better if you experiment A LOT
This will give you an acceptable video of 1.5 seconds, if you like the result after QUITE some time (1h to 2h), you can up the frame number to something like 30-60 to get a longer video
VAE tiling will decrease quality but allow lower end devices to run the video generation
Keep in mind that when beginning, all the models have to be loaded, that means that you will have some minutes (5-10), that your phone will feel laggy and slow, I recommend leaving the screen on and to not do anything else until that period ends (you can see when that happens in the RAM usage bar in the dashboard, you will see that it frees a lot of RAM)
9. Audio Transcription
First the user will need to download a whisper model, if you are only going to use it for english download the english variants for better performance, also I recommend always using the Q5 variants, they are faster with a smaller memory footprint and you will notice little to no quality loss. Also Base/Small variants are the most balanced.
Steps:
- Select the model you are going to use
- Select your audio/video or record one
- Choose the language, you can use auto-detect, but if you select the language the quality improves a lot
- You can choose to translate to english
- Choose the file formats you want the transcription in, they will all appear in your output folder and you will also have the transcription in the notes of the app when it finishes
- You can also send videos/audio from other apps to ADT for transcription or transcription+summary using the workflow, by using the share function
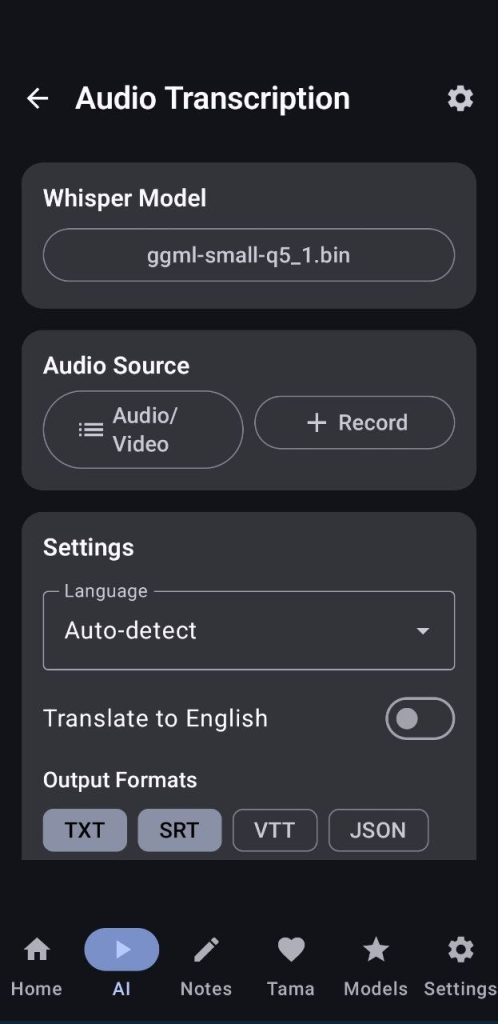
In the general app settings you can choose the amount of threads to use for transcription (I suggest using the default)
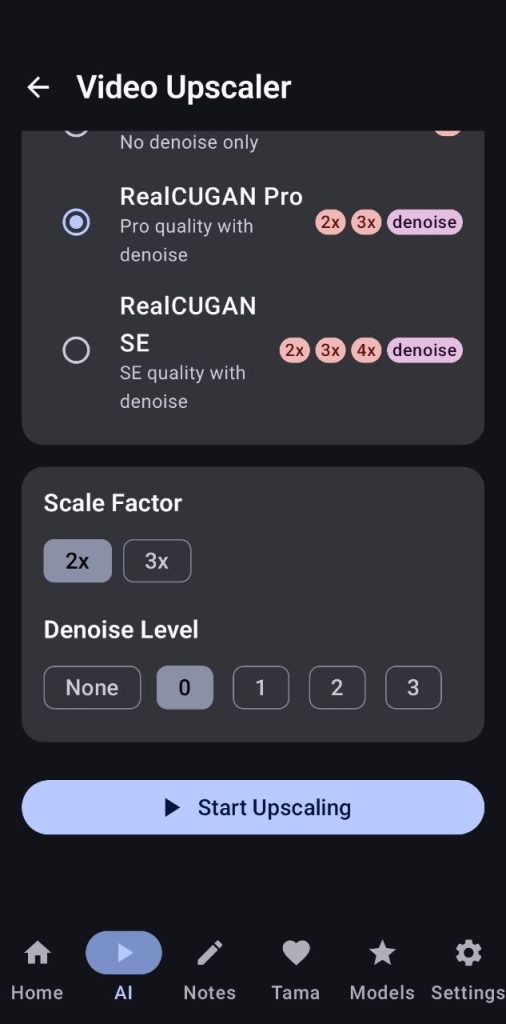
10. Video Upscaler
This tool allows the user to upscale any video to a higher resolution by using predefined models that will be downloaded the first time you open the card
Each model supports a fixed upscaling factor, some of them more than one and some of the RealCUGAN variants support denoising. Choose the video to upscale and the model that better fits your needs and then select the scaling factor + the denoising if available. Under the video selector you will see the estimated final resolution.
Keep in mind that this is a lengthy and heavy process, and depending on the original resolution and the duration of the original video this can take several hours.
You can tweak the amount of threads used for loading frames, upscaling and saving the upscaled frames in the general settings tab. I suggest you tinker with them to see the best fit for your device that allows you to keep using it while upscaling
The final video will be saved inside your output folder
11. Subtitle Burn
This tool complements the transcription tool, here the user can select a video, a subtitle file and burn the subtitles directly on the video, you can choose the font size, the alignment, margins, color and font to better suit your needs
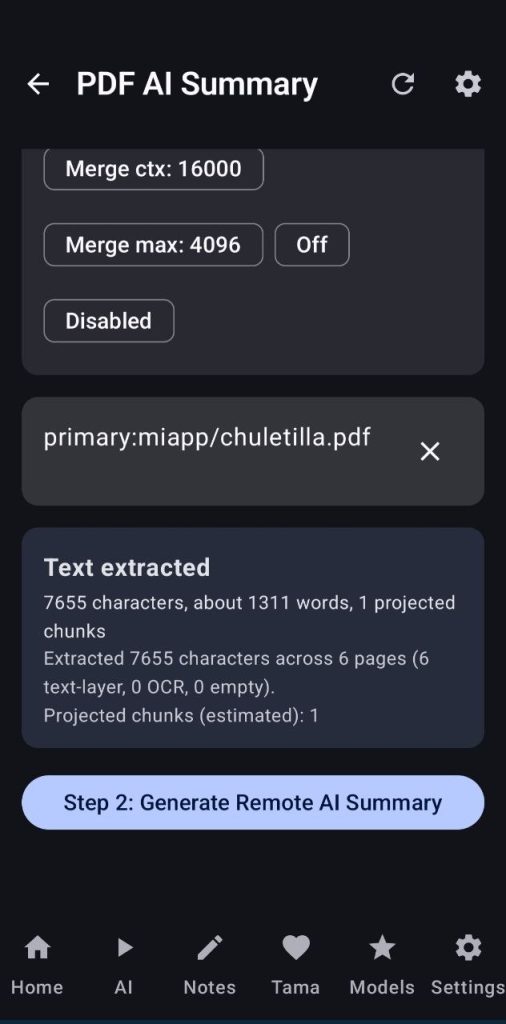
12. PDF Toolbox
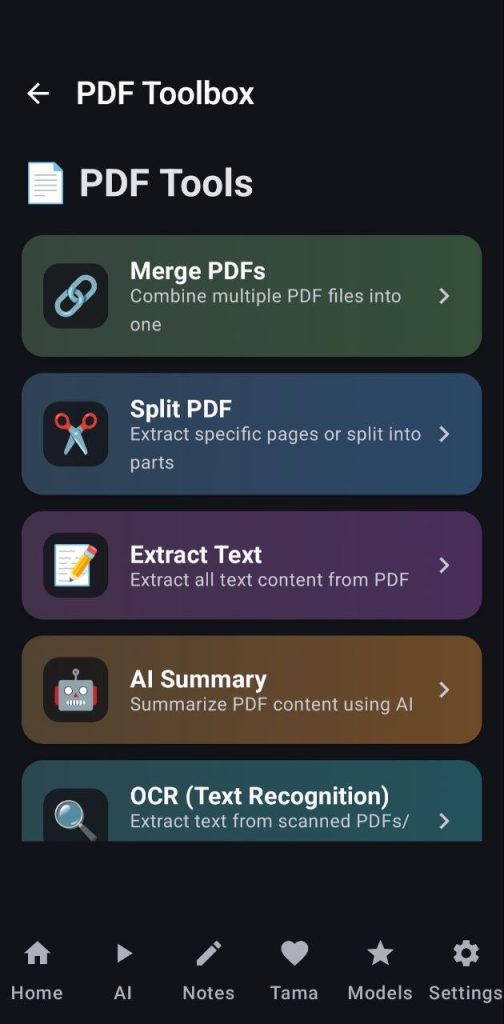
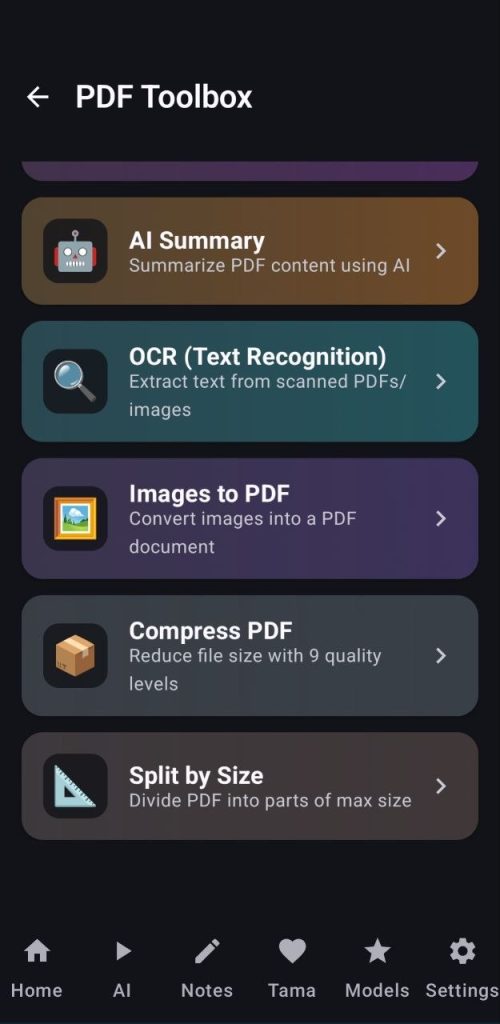
Here you can do all sorts of things with your documents
- Merge different PDFs into one file
- Split PDFs
- Extract text from the PDF
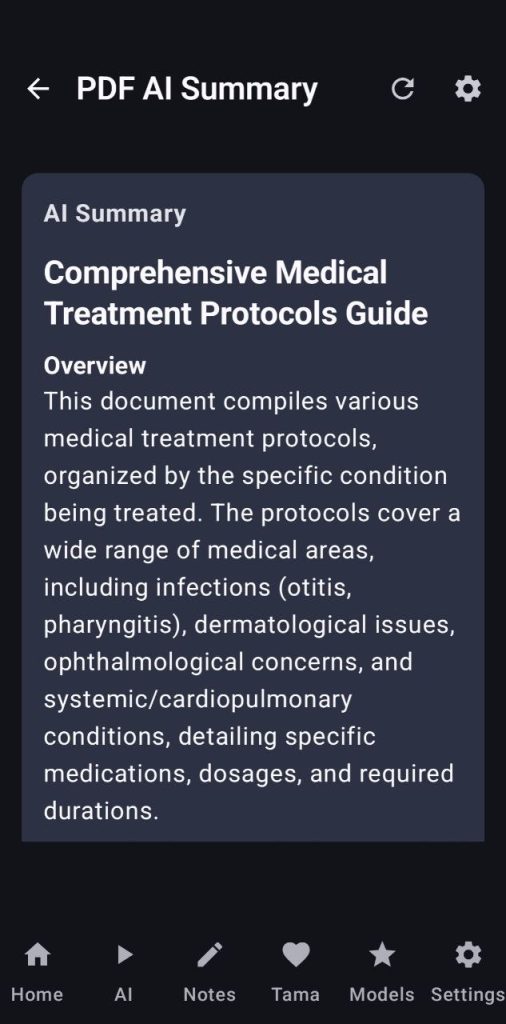
- Summarize the content of your files with AI using your llama server running on the app or the ollama backend
- Recognize the text on images with OCR
- Translate OCR’d PDFs to your desired language
- Convert images to PDF
- Compress PDFs with 9 levels of quality
- Split PDFs by size
As you can see there are a lot of tools, but my favorite is the summarizer, it will take your document, split it into chunks according to the context length you setup your server with and then it will summarize all the chunks, then join everything together and make a clean pass before giving you the final summary that will be available inside the Notes tab
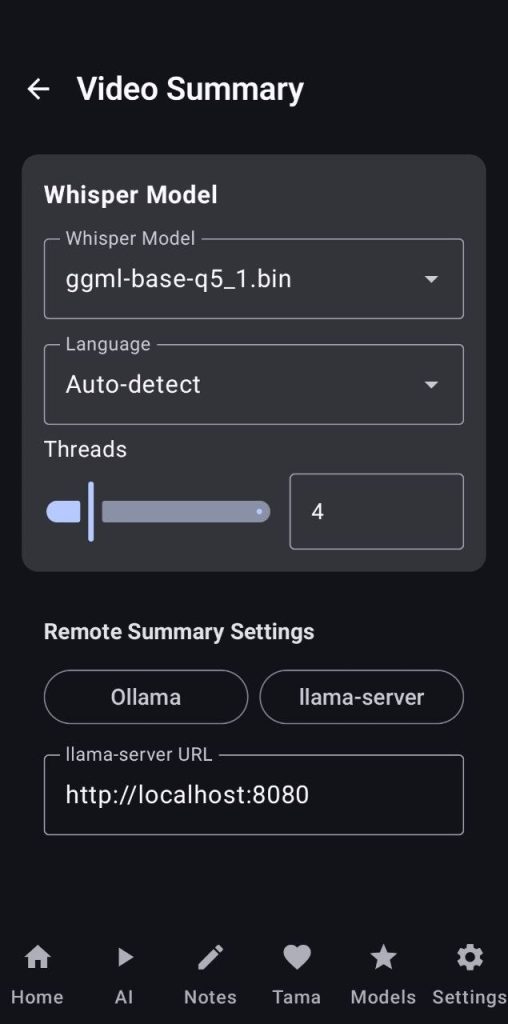
13. Video Summary
This tool works the same as the PDF summary but instead of using a document you will select a video, we will use the transcription tool to extract the audio and then sum it up, the final summary will also be saved inside the Notes
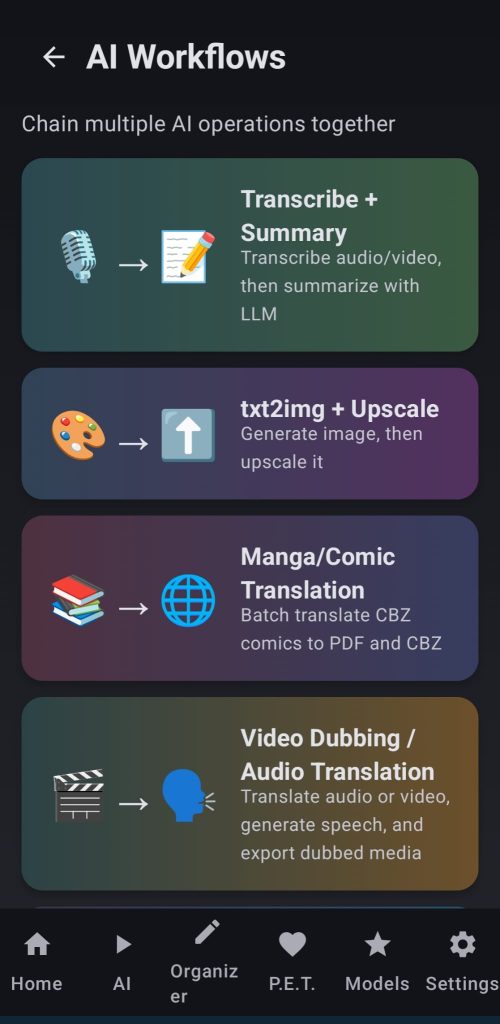
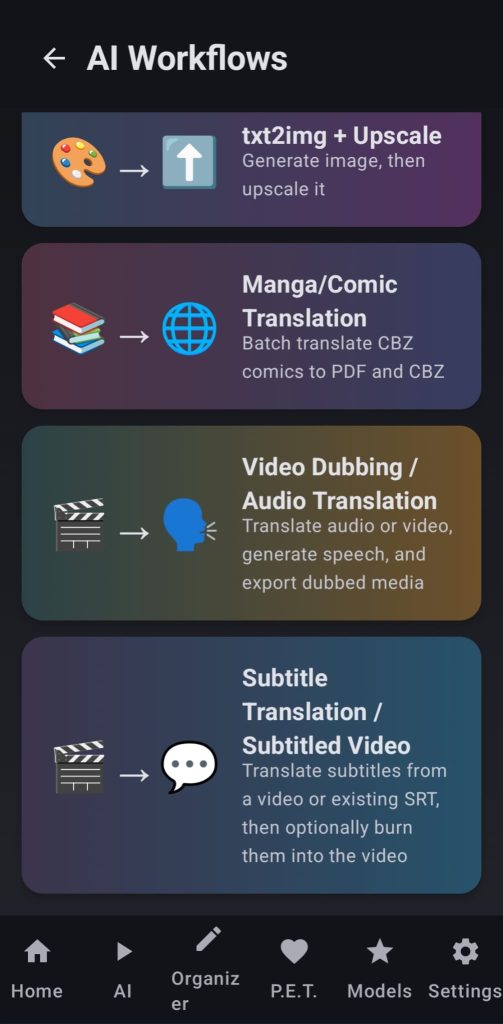
14. Workflows
This tool allows the use of 5 pipelines (we will be adding more in the future according to your feedback), the user can specify their preferences inside each workflow and use them whenever they see fit so they do not need to keep changing all the options whenever they want to run the same style of workflow
Right now, there are five workflows:
- Transcribe + summary (for those super lengthy audios from some friends…), you can also use this workflow by sharing an audio with the app
- txt2img + upscale, this one uses only the SD generation backend, this way the user can automatically upscale the generated image and get the final upscaled image
- Manga/comic translation. Select your CBZ files, modify yor PDF translation settings and choose the output you need (PDF or CBZ), the app will extract the images, convert them to PDF, translate them and return it to you as a PDF, CBZ or both
- Video dubbing/audio translation, select a video and choose your settings, the app will take the audio of the video, transcribe it, translate it, run TTS and then put it back into the video so you have a dubbed version to your desired language. If an audio is selected the app will return an audio in your chosen language
- Subtitle translation/subtitled video. Select a video with/without an SRT file, the app will generate subtitles for the video and burn them in, if translate mode is enabled, the app will also translate the subtitles to the desired language
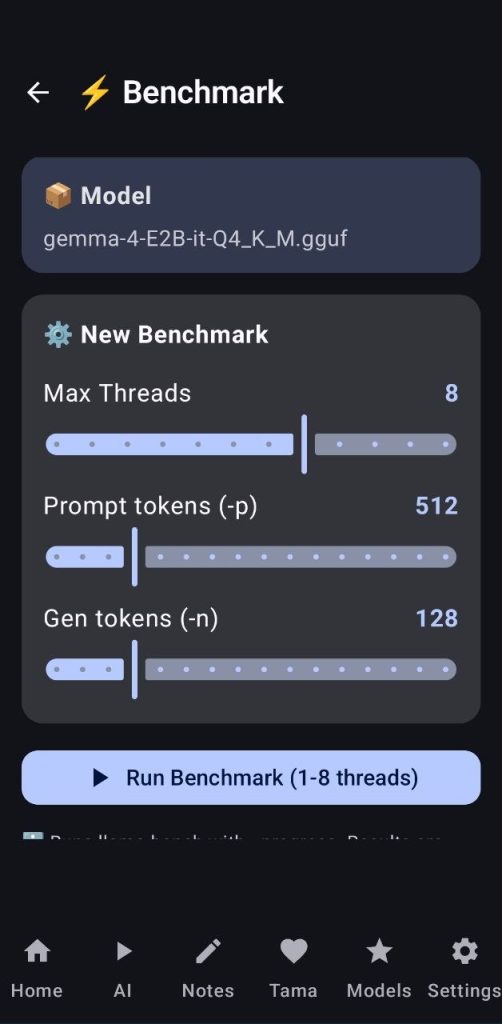
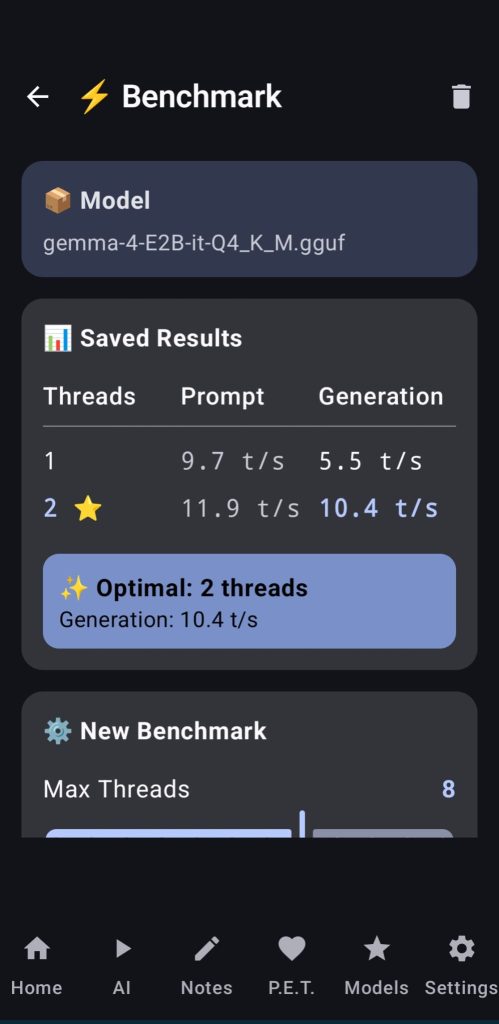
15. Benchmark
Here, users can test the best thread configuration for their selected LLM, they can select the max number of threads to try with and the app will run the benchmark with the different number of threads, when finished it will return a table to the user with all the values and the optimal threads for that model and for your device
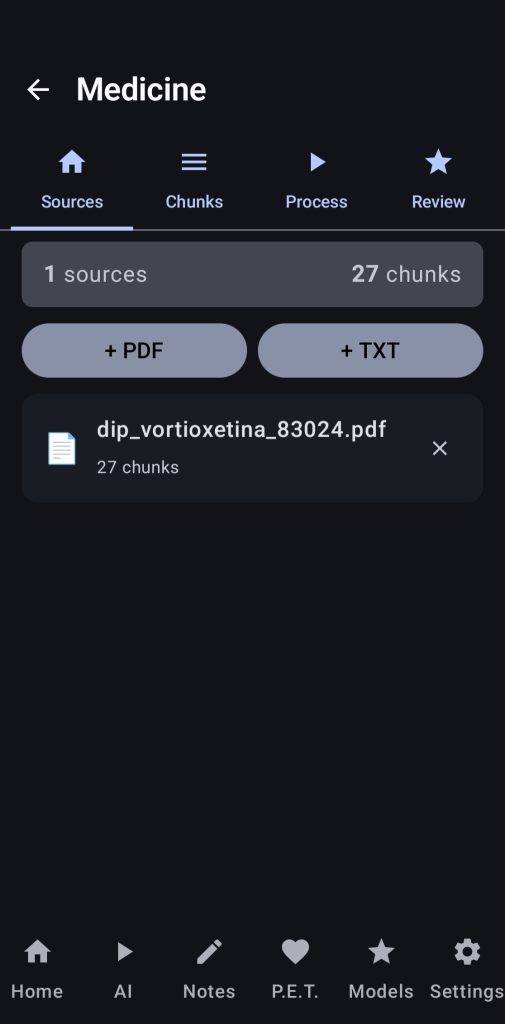
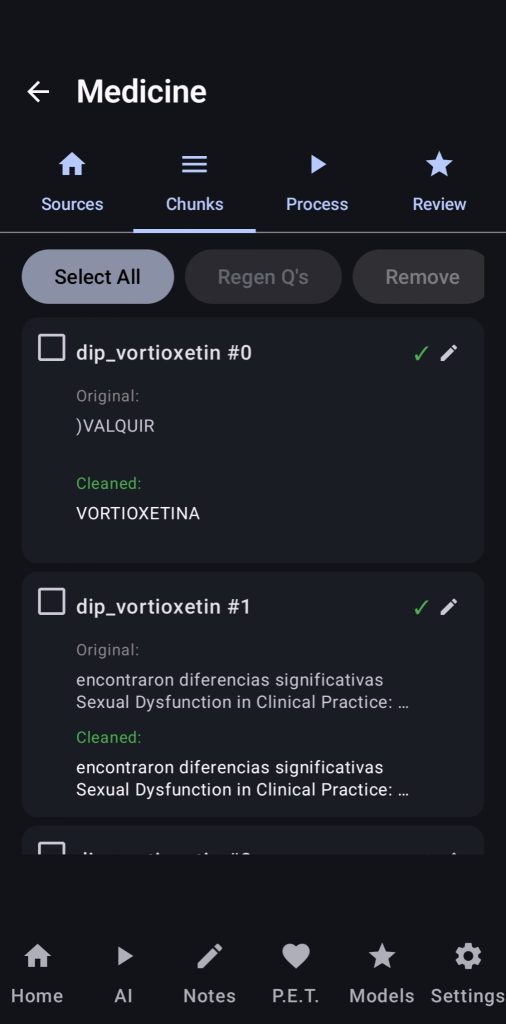
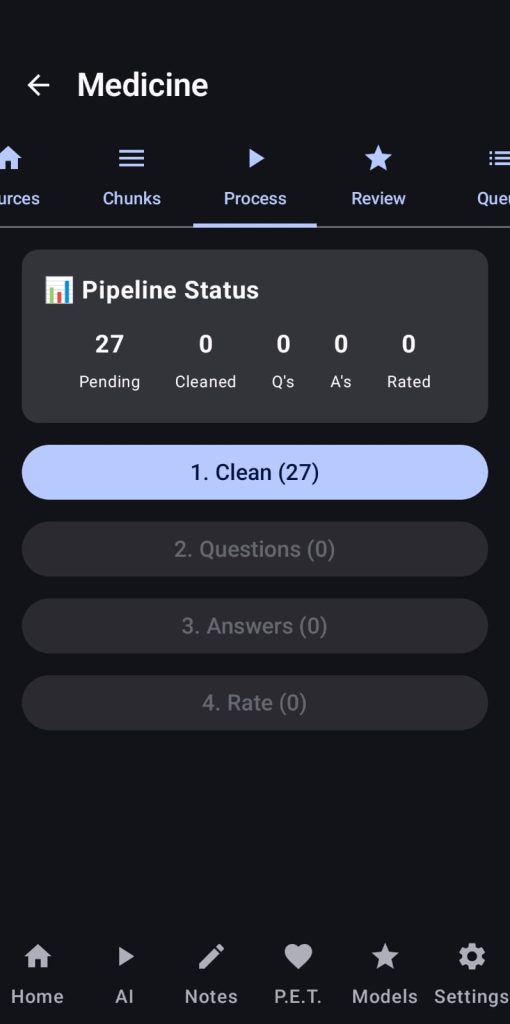
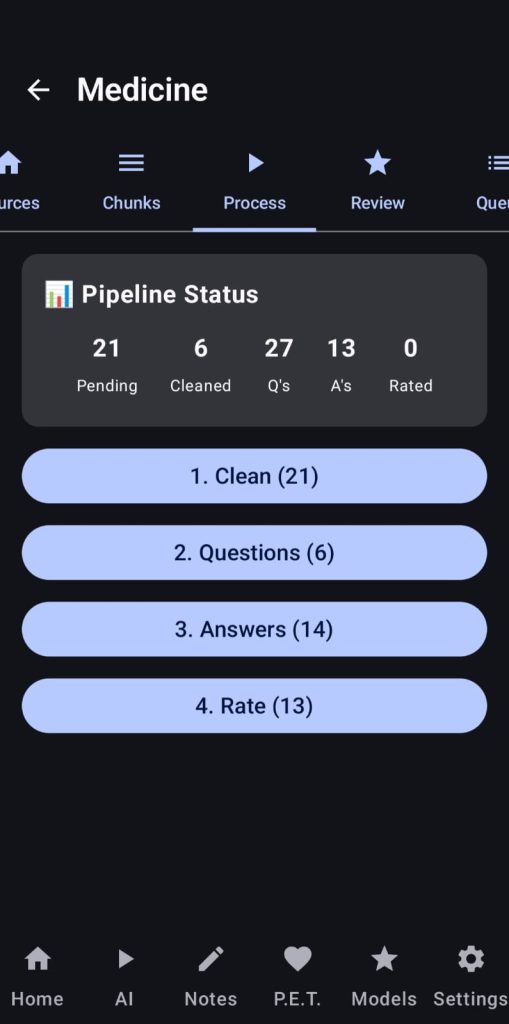
16. Dataset Creator
Here users will be able to generate their own datasets for training/finetuning LLMs, the app will automatically extract chunks of text based on your declared context size (you need to set your context size and other variables in the settings of the dataset creator in the right side of the bar).
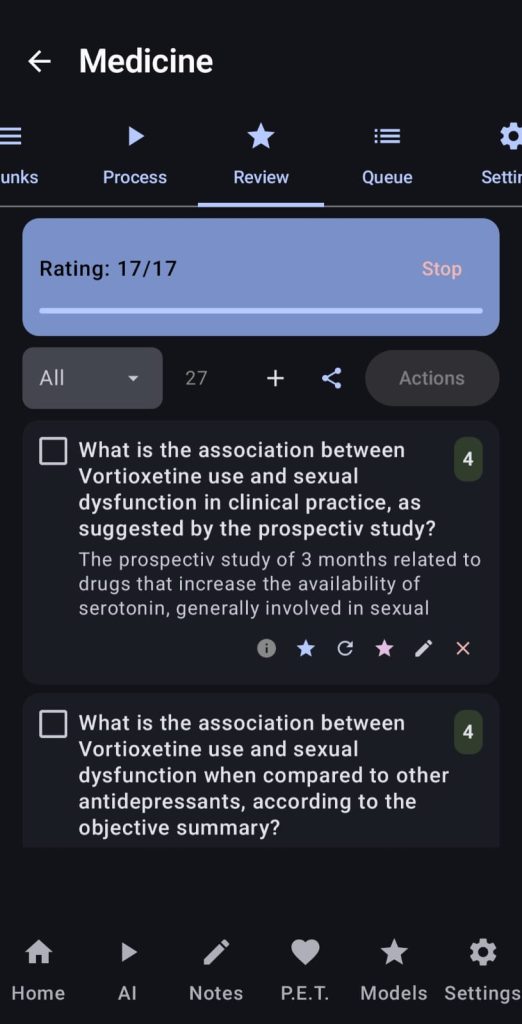
After extracting the chunks the user can review and edit/remove the chunks shown, then they will go to the «Process» tab, where one by one our LLM will clean the chunks, generate questions, generate answers to those questions and finally rate the quality of our Q&A pairs.
When all the process has been finished, in the Review tab the user can check the score justification by clicking on the violet star, trigger a new rating/regenerating it by clicking the pink star or the circle arrow, edit the question or answer or just remove that pair. Finally the user can filter by score, choose the pairs they prefer and export them using the alpaca format into a json file.
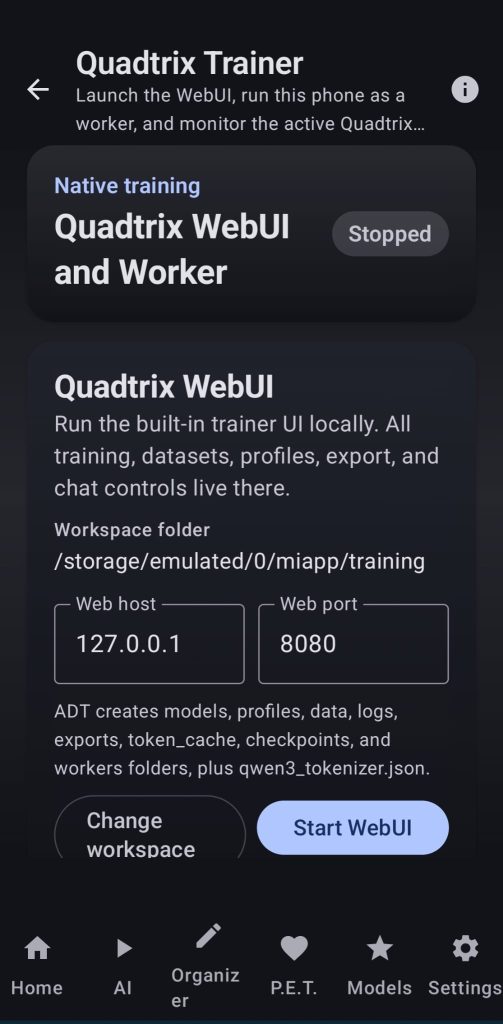
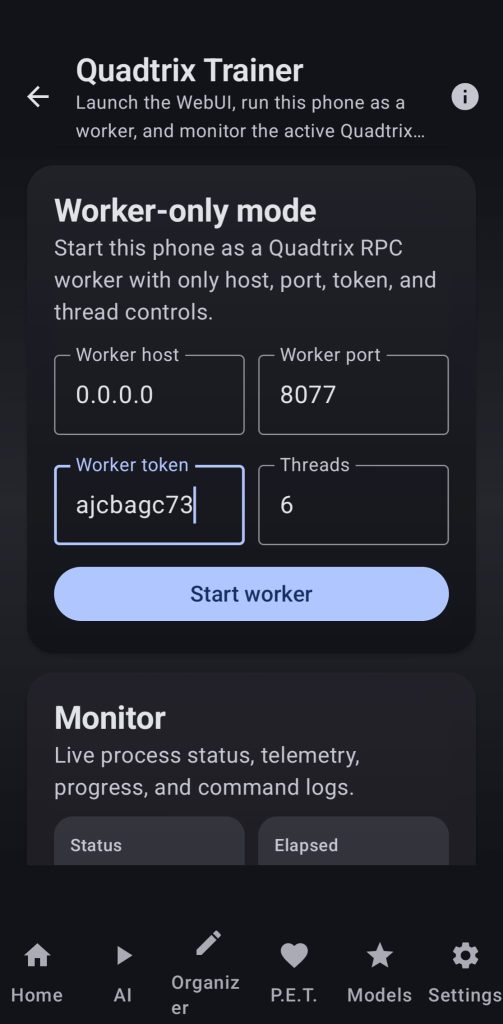
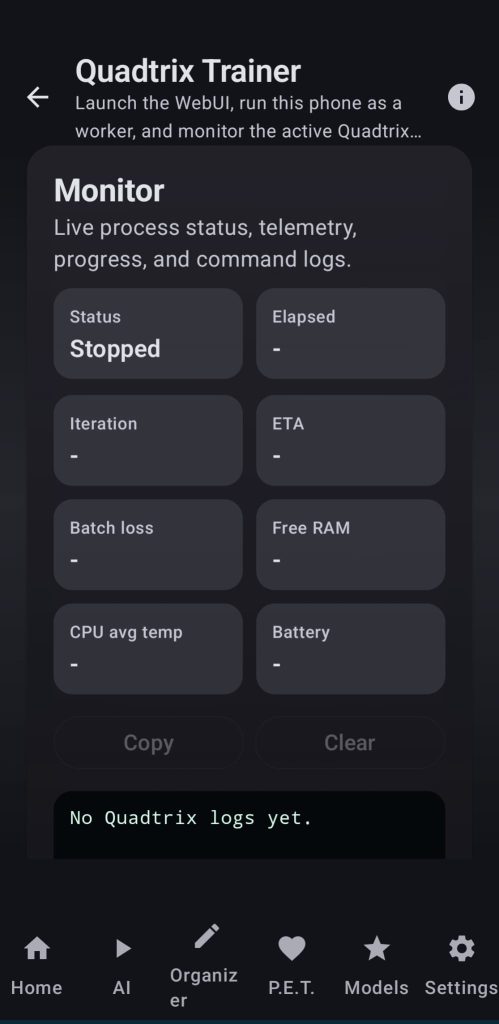
17. Trainer
Use the power of a modified version of quadtrix to be able to train models using your own devices, you can run the training alone or in a swarm. Every parameter can be chosen through the webui and the user can also monitor the state of their device from within the app while the training is running.
Use your generated datasets or import new ones from the internet, make test runs and use your newly created models
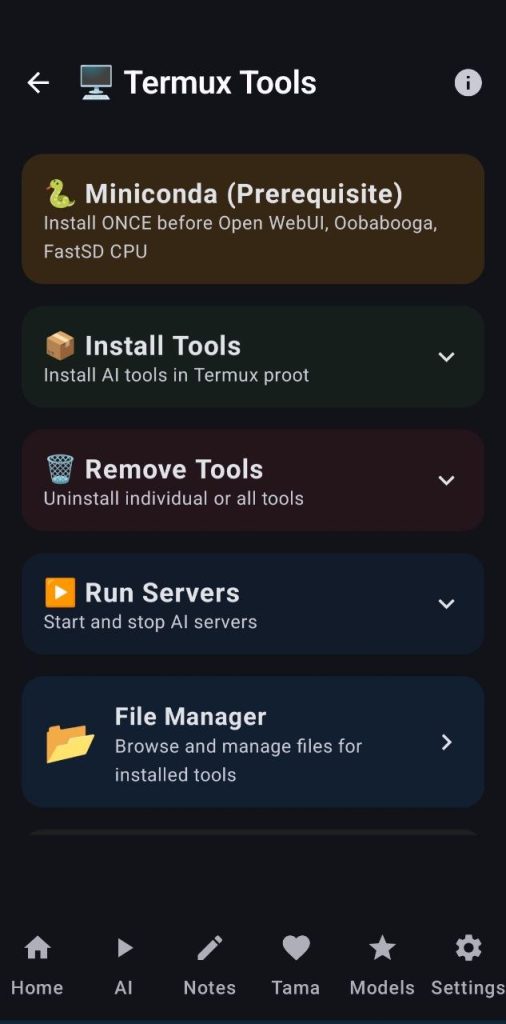
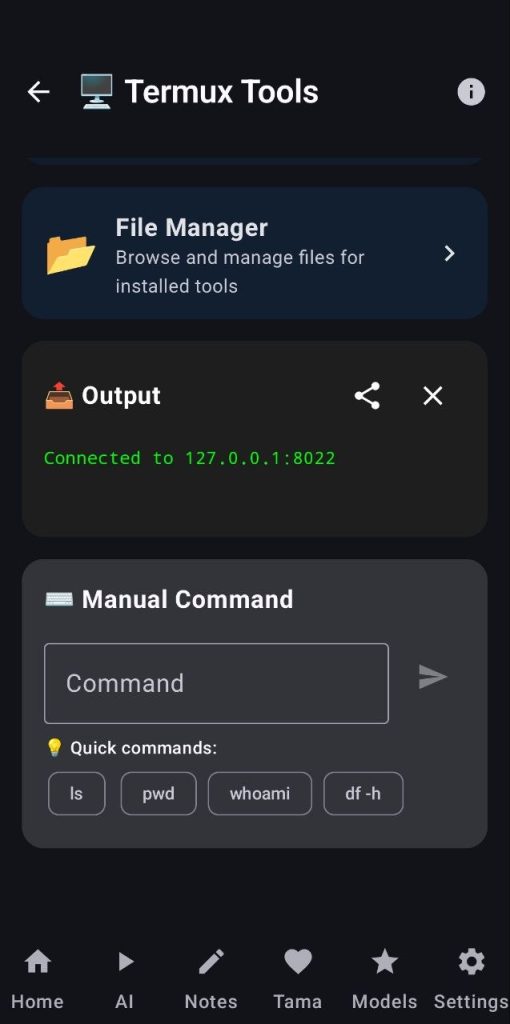
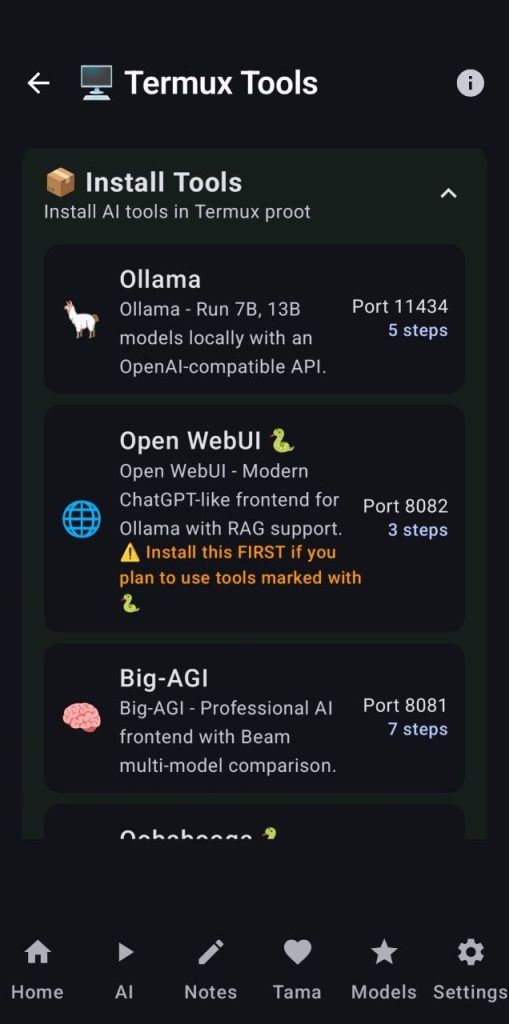
18. Termux SSH tools
This tool lets you use the power of Termux to deploy and manage several servers like:
- Ollama
- Openwebui
- Big-AGI
- Text webui
- Fastsdcpu (webui server and mcp mode)
- A1111
The user can choose which tools to install and follow the installation progress in the bottom terminal or just click on install all (this will take ~1h and 35GB, so be careful). The info button at the top right corner will show the user how to setup everything and even give a one line command to help setup the proot environment where all the servers will be running (always read and understand online commands before using them)
Wether you install the servers one by one or all at the same time, you will always be able to read and edit the command before sending it, mind you that I had to fork the repositories to keep future installations from breaking and I make some changes to requirements.txt or start file at installation to allow them to run on android phones (you can see all those changes in the installation commands)
This screen allows the user to start/stop servers, read their logs through a terminal collapsible block and even access their webuis/galleries. You can also manage the filesystem or send custom commands.
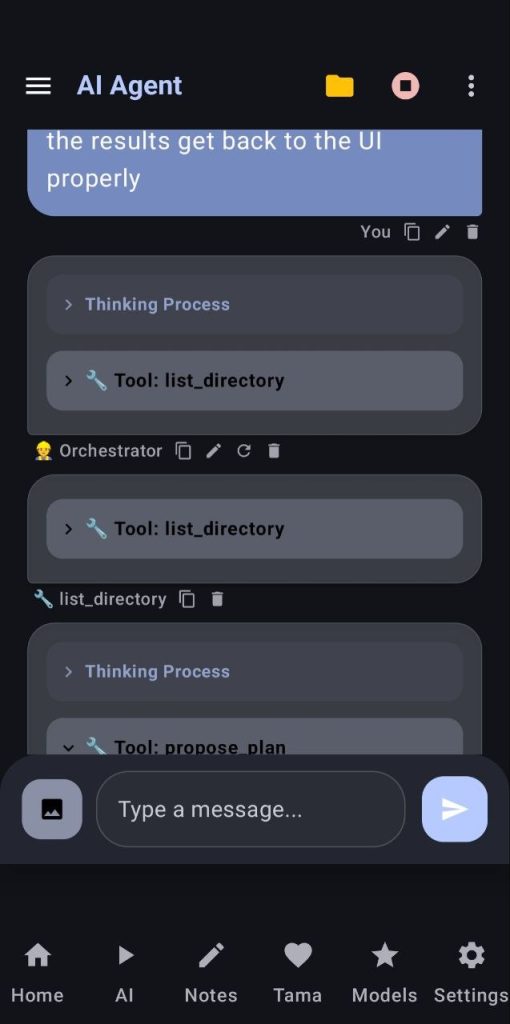
19. AI Agent
This is the second and last tool that works with termux, tap the three dots and select «AI Agent Setup» to see how to setup the proot env and start the ssh server. Connect to the ssh server and select your backend engine (ollama or llamacpp) After that you can configure your agents, add custom agents/tools, etc…
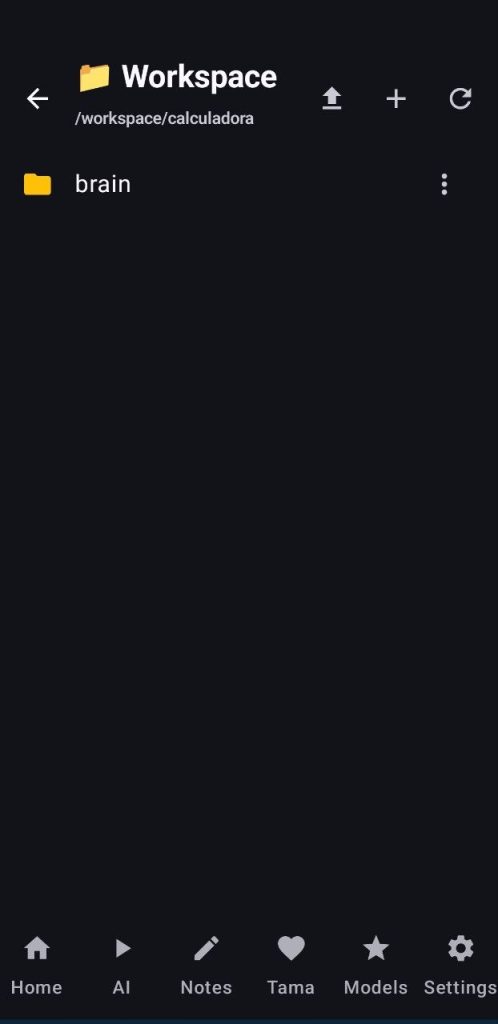
After setting everything up, click on the hamburger menu at the top left corner, start a new project and the app will automatically create a new folder under /workspace in the proot env, with the name of your project and a brain folder inside it where the agent will store implementation plans, states, audits, context compactions, etc…
Once your project is created you can prompt your agent to start with a project, it will generate an implementation plan and ask you to fix it or accept it (if you use the phone’s server, any project will take long, but I have seen nice results with gemma4-E4B and qwen3.5 4b and 9b)
You can access the workspace folder, check the files/images created by your agents, read, edit, compress, delete or even download them. Under this workspace screen the user can also upload files, open a terminal to run commands and stop commands running inside that environment.
I have been able to one shot the creation of a webui with a pomodoro timer with gemma4-E4B. What will you be able to do?
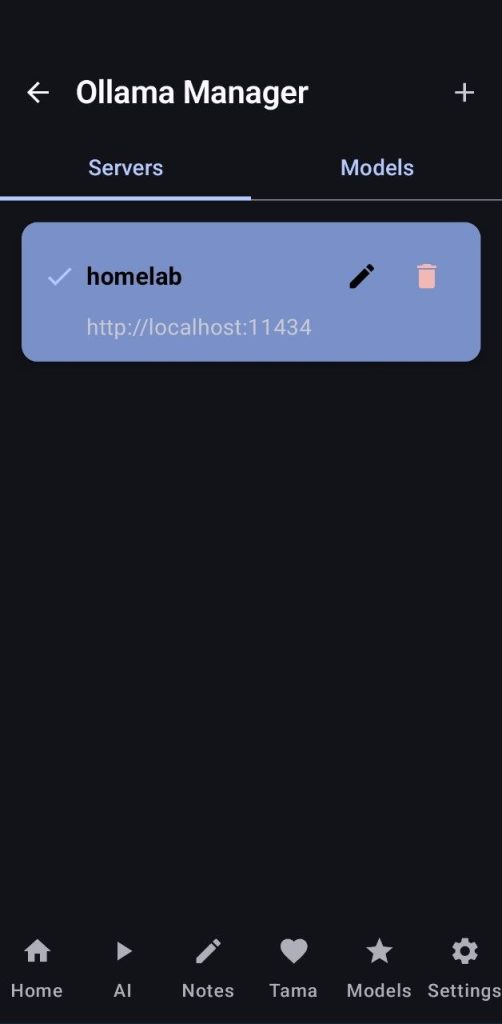
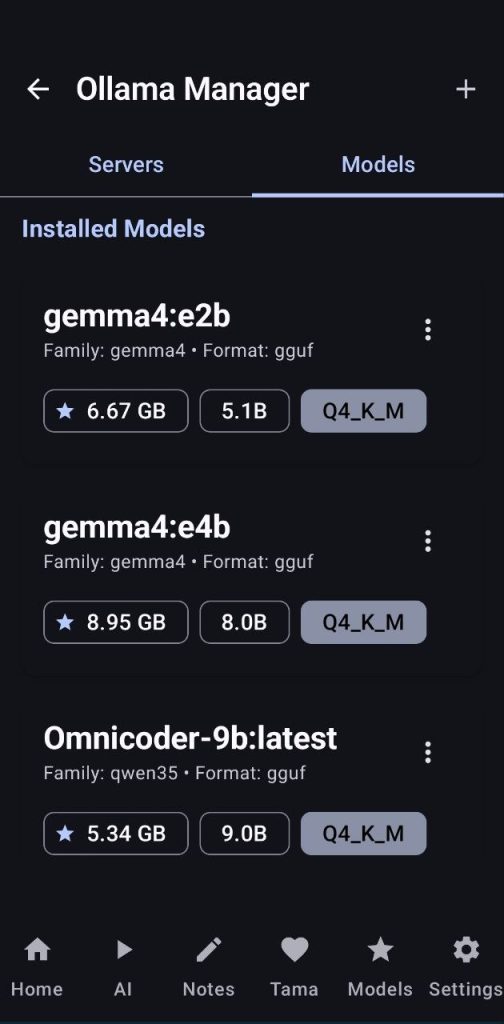
20. Ollama Manager
Here the user will be able to manage their ollama servers by downloading new models, deleting others, etc…
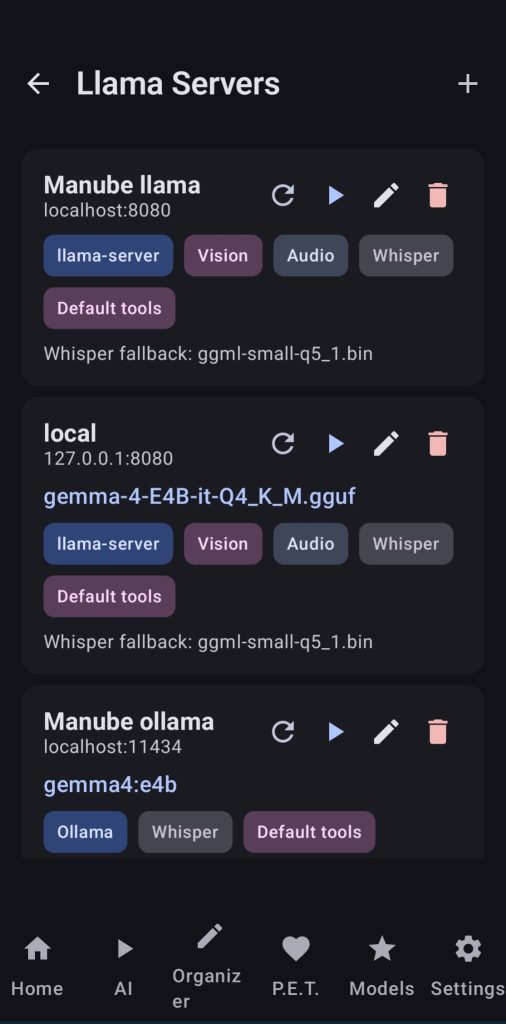
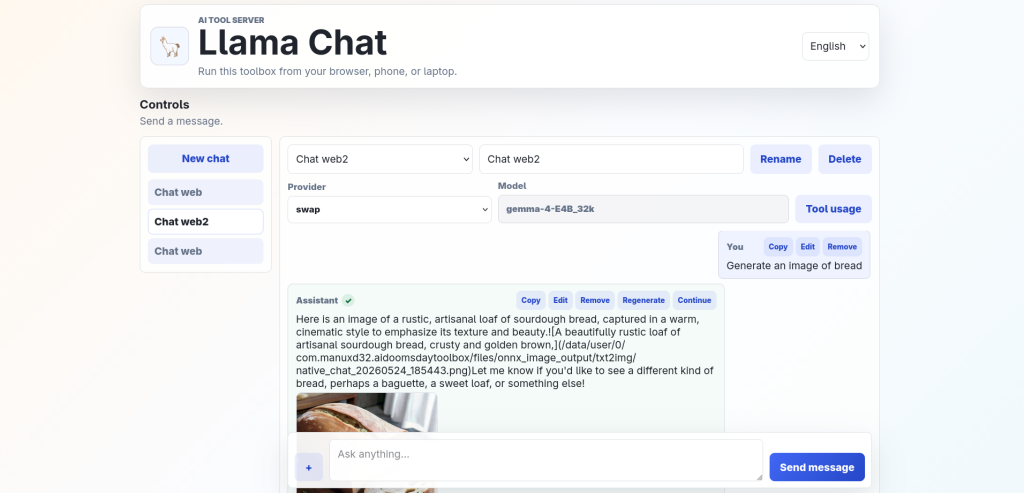
21. Native Llama Chat
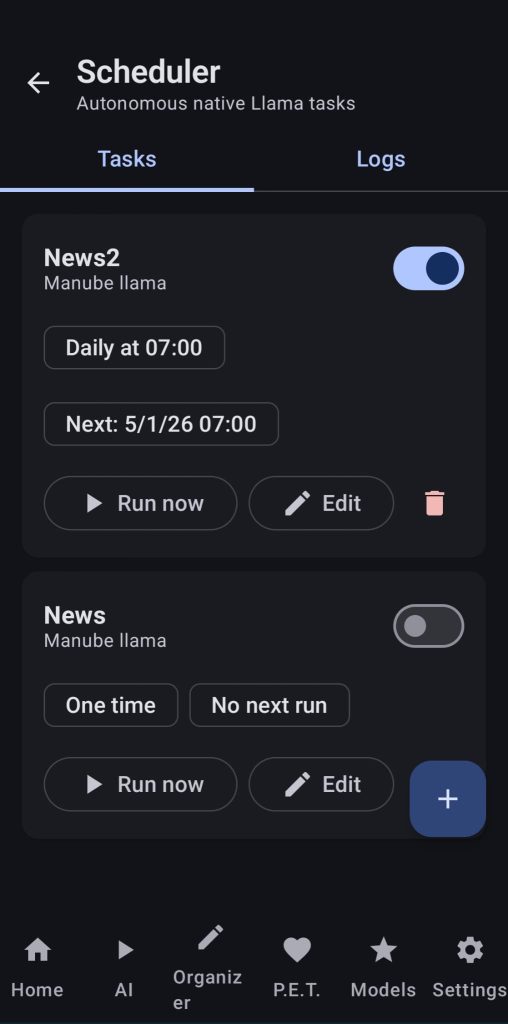
Here the user will be able to add Llama cpp and ollama servers, allow vision/audio/tools support and enjoy talking to their models or setting up tasks that they will do whenever the user has scheduled.
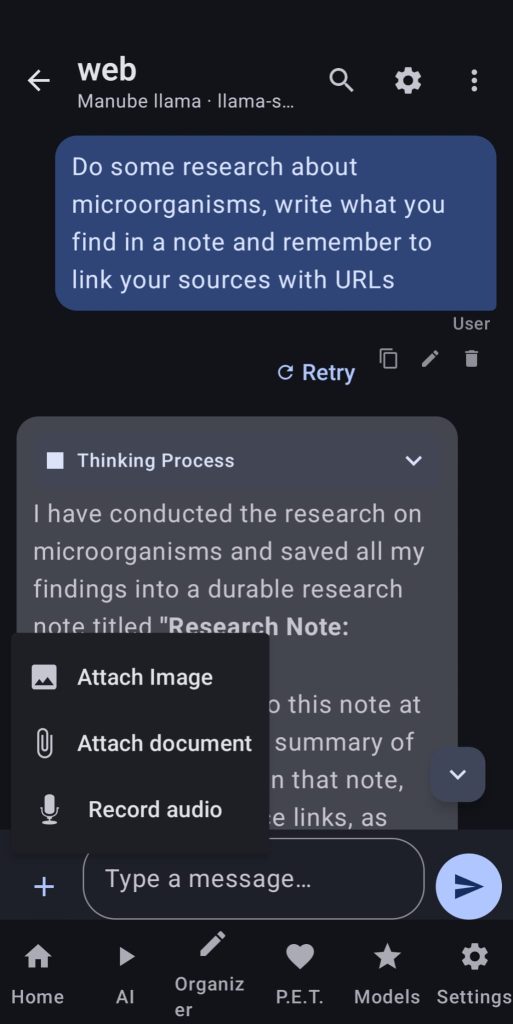
The available tools allow the LLMs to write and modify notes, events from the calendar and even create alarms.
The user can send images, audio and files to the LLM, if audio is not supported by the LLM, the app will try to use whisper to transcribe the audio and send it to the LLM. Files will be sent as raw text, the text sent will be visible in a small collapsible box (same with transcriptions).
LLMs can generate images by using the ONNX runtime in the app (if configured first) and send them to the user in the chat or put them in a note.
Usage example: I created a task that each morning gathers 10 tech news, makes a summary and writes a note with titles, summaries and URLs so I can read the whole text. You can also send an audio to your LLM telling it to create some events for you in the calendar or setting up alarms.
Users can now create shortcuts to chats, for easier access from main phone’s screen. I have also created three kinds of widgets, one for a calendar that shows your written events, one for upcoming events (making the calendar one tall enough will also show upcoming events) and one for showing notes/check lists
New LiteRT mode available, download the models and select CPU or GPU mode.
New Call mode, talk to your LLM as if you were in a call and here its voice using the TTS backend.